
Something that has surprised me about teaching piano is that learning to read music can be a long, tedious process for many students.

As a student, I was a pretty quick reader and always found it easy to connect with the written page. Several years ago, I had a bit of a panic moment where I thought I was failing as a teacher because it seemed like none of my students could really read music.
It’s moments like these that remind me to step back and acknowledge that every student comes with a different set of strengths and challenges. As teachers, we can’t assume that our own experience will hold true for our students.
This is where solid pedagogical training is so important. We have to be able to reach into our toolbox and find the best resources to help our students succeed, rather than just relying on the way we learned years ago.
Over time, I’ve come to realize that learning to read music is often a 3–5 year process for most students — and sometimes even longer before it becomes truly fluent. That’s a long game!
I’m sure you’re like me and have stacks of flashcards and all kinds of clever mnemonic devices to help students remember their notes. I love those tools, but the reality is that they don’t always do the whole job. They help students find notes, but not always read them with confidence.
After trying many different approaches over the years, the method I come back to again and again is teaching students 9 guide notes along with intervallic reading.
I’ve found this to be one of the most effective ways to build long-term reading skills because it gives students something they can always fall back on.
If you’re not familiar with the 9 guide notes, here they are:
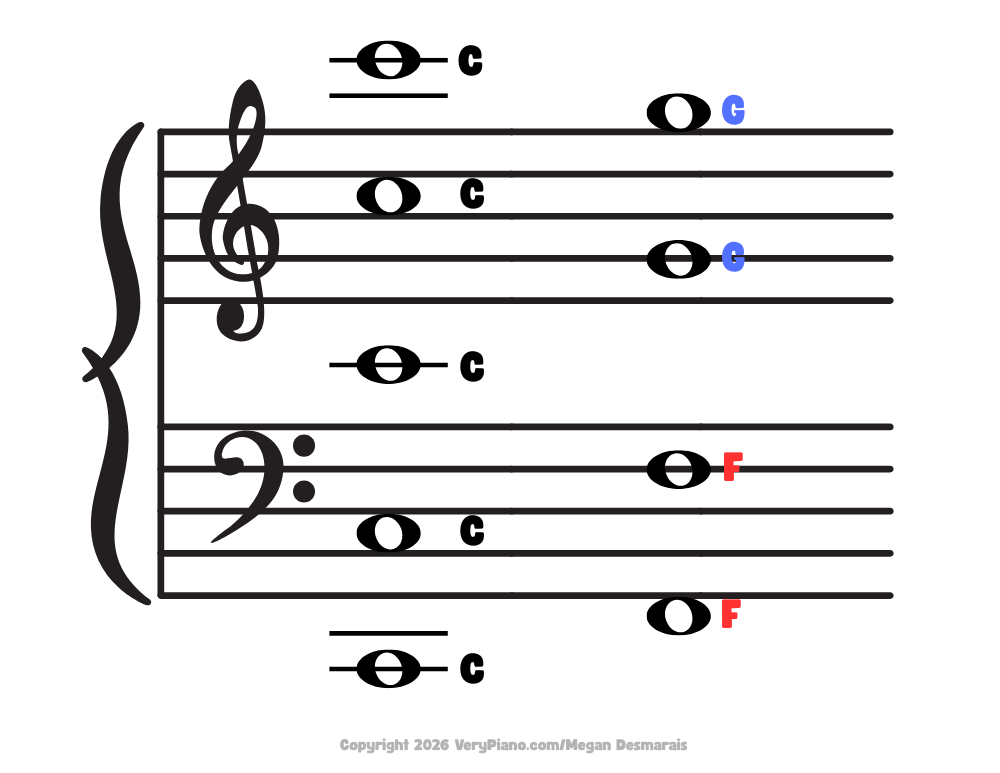
👉 5 C’s, 2 G’s, and 2 F’s
If your students can confidently find these 9 notes, everything else is just a step or skip away.
A really neat thing about the guide notes is that each one has a “mirror.”
I often tell students to imagine Middle C as a mirror — bass and treble C reflect each other, and low and high C do the same.
For G, I show students that there’s a “fancy capital G” hiding inside the treble clef. I trace it with my finger and show how it curls around the G line. That line is where G lives, and its octave sits right on top of the staff.
In the bass clef, the F’s mirror the G’s of the treble clef. We talk about how the bass clef symbol comes from a fancy letter F. It has a “button” sitting on the F line, and its octave sits just below the staff.
One thing that has made a big difference in my studio is having a simple visual reference for these notes that students can return to again and again.
I created a printable that I always keep nearby during lessons so students can quickly spot and review the 9 guide notes. On the back, it includes a few mnemonic devices that we like to use as well.
👉 You can grab a free copy for your studio below.
Once students are comfortable with the guide notes, I take it a step further by having them build those notes on an E-Z Notes Magnetic Staff Board.
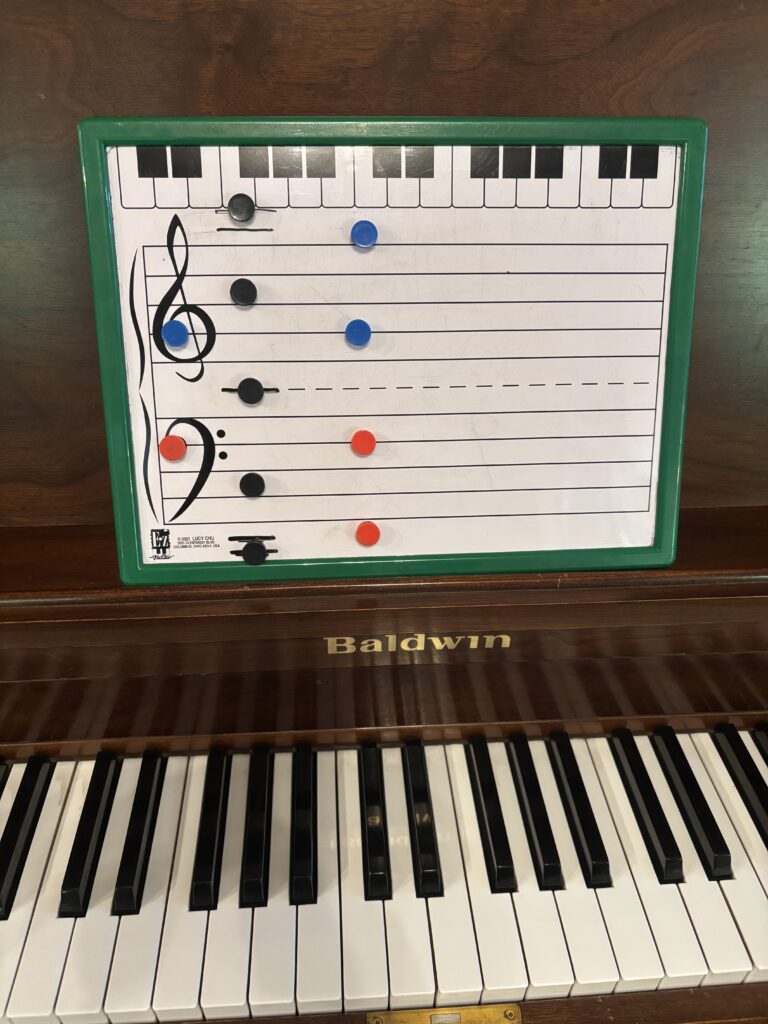
We often start lessons by placing all 9 guide notes on the board. Repeating this regularly helps everything click much faster.
Here’s why this approach works so well:
• It gets students reading across a wider range of the staff instead of staying stuck in one position
• It isn’t tied to finger numbers or hand positions, which gives students more flexibility as they progress
• It naturally reinforces intervallic reading — every other note becomes a step or skip away
Over time, I’ve seen students gain so much more confidence when they understand how the staff is connected instead of trying to memorize isolated notes.
If you’re looking for a simple way to make note reading more approachable (and a lot less frustrating), start with the guide notes and give your students something visual and hands-on to work with.
👉 You can check out the magnetic staff board I use in my studio here:
E-Z Notes Magnetic Staff Board
👉 “Want a copy of the guide note printable? Scroll up to grab it for free!”


